As you can hopefully tell by the opening photo, this week I added a bunch of grapes to my felt food project. And my basket is filling up! If you're new to this project see week 1 here and week 2 here.
Materials:
*felt - purple or green (depending on what color of grapes you want to make), green, and brown
*embroidery thread - purple, green, and brown
*fiber fill
*patterns found here
1. Using the patterns, cut 18 grape circles, 4 leaves, and one 1-inch by 3-inch rectangle of brown. With thread that matches or comes close to the felt you're using for the grapes, sew around the outside of the grape circles using large stitches. Pull up on the stitches to make a cup shape.
2. Stuff cup with fiber fill, sew across one side of the opening, turn the grape and sew across the other side.
3. Repeat with another grape circle. After you've finished step 2 with the new grape, attach it to the first grape.
4. Continue until you have five grapes attached in a ring. Make another grape and add it to the center of the circle, attaching it to all the grapes in the ring.
5. With the grapes in your first ring facing the way shown in the photo above, continue making grapes and attaching them to the first ring. Starting with the second ring, attach your grapes so the gathered opening faces up and is hidden by the previous ring.
Second ring - five grapes. Offset them from the first ring by attaching them in the space where two grapes from the first ring meet.
Third ring - four grapes.
Fourth ring - three grapes.
Fifth ring - one grape added to the center of the three grapes in ring four.
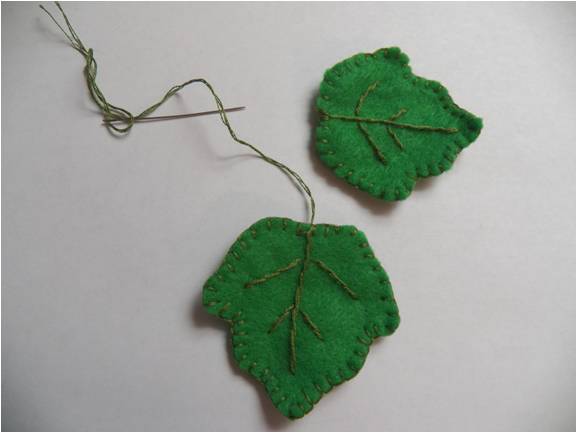
6. Put two leaves together and join with a blanket stitch. Embroider veins using an outline stitch. Repeat with the other leaf.
7. Attach the two to the top of the grape cluster.
8. Take the brown rectangle and roll it up tightly. Secure the loose edge with a few stitches. Attach between the two leaves.
And you have a bunch of grapes! And I'm already thinking about what my next food will be ...
Happy Creating! Deborah


Oh wow! These are so cute! Thanks for sharing the tutorial!
ReplyDeleteI have a rosette necklace in a great giveaway right now, would love for you to enter and win! http://bouffeebambini.blogspot.com/2011/09/seek-first-rosette-necklace-giveaway.html
Fantastic felt food tutorials. Can't wait to make them for my little girl and boy.
ReplyDeleteThanks for your helpful sharing
ReplyDelete