I'm taking a short break this week for some family time! See you next Monday!
Deborah

Monday, May 27, 2013
Friday, May 24, 2013
Friday Inspiration - Maryanne Burr's Quilts
If you like quilting, silk, and fabric painting you have to visit artist Marianne Burr's web gallery! Marianne paints and dyes the silk, then quilts it with hand stitching. And her designs are gorgeous - bright color, interesting shapes, and fun textures! And I love how they don't look like anyone else's work - such fresh, new work to be inspired by.
Marianne also writes a blog about her work and the many shows she's in - definitely worth reading.
Happy Creating! Deborah
 |
| Eleven 3 Eleven, 43" x 32" |
 |
| Cotton Candy, 47" x 37" |
 |
| Guavas, 12" x 12" |
Marianne also writes a blog about her work and the many shows she's in - definitely worth reading.
Happy Creating! Deborah
Wednesday, May 22, 2013
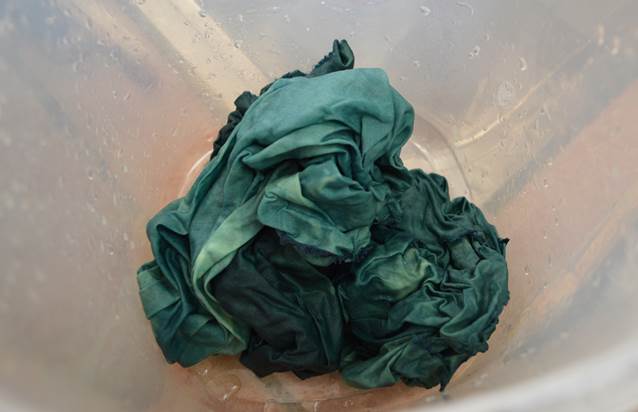
Indigo Tie Dye
This was very easy! I started with a white t-shirt, folded it accordion style starting at a corner so that the folds ran diagonally.


Then I tied it off about every 2 inches by looping artificial sinew around the shirt three times, pulling it tight, and making a knot.

And into the indigo pot it went!


Now this experiment I like! Even though I had no idea what I'd get. Sort of reminds me of comets!

Happy Creating! Deborah
Monday, May 20, 2013
Tie Dye Experiment

In case you look at these with unbiased eyes and love them, here's how they went together:
1. See basic tie dye instructions here. I used Procion fiber reactive dye powder in Alpine Blue, Medium Blue, Terracotta, Yucca, Baby Pink, and Ice Blue.
2. I started by folding the T-shirt in half.

3. And then brought the bottom up until I had a square.

4. I then folded the top and the sleeves over the square.

5. Next I folded the shirt in half again to get a triangle.

6. And then folded it again to get a long triangle.

7. I drew lines with a washable marker to show where I wanted to put the rubber bands.

8. Put the rubber bands on tightly.

9. And began applying the dye - one color in each section.


10. Into the bags they went until the next day.

And voila ... sort of! One thing that may have helped would have been to put on more dye and to then squish the section around to make sure the dye was reaching all the fabric - that's why I have large white spots.

Back to the tie dye drawing board!
Happy Creating! Deborah
Friday, May 17, 2013
Friday Inspiration - The Art of Kuboku and Hisako Takaku

It's too late to go view these beautiful works in person, but the museum has an information page with videos available on it's website that are very interesting. The demonstration by Hisako is about an hour long, but don't let that put you off - it's fascinating! There are a lot of introductions and thank you's for the first 5 minutes, a background talk until about the 15 minute mark, and then the demonstration begins.
Looking at the kimono in close up really shows the fine detail and the shading they can achieve! Below is the Winter Kimono with Plum Blossoms and below that a close up detail:


Felt Cafe has a great photo demonstration of how roketsozome is practiced with indigo in Kyoto - definitely worth a look.
Summer is definitely not the time to be indigo dyeing outside in Phoenix, so I think I'll work out some designs and give this a try come fall!
Happy Creating! Deborah
Wednesday, May 15, 2013
I Made a Glossi!
I made one of those discoveries that changes the way one thinks! I (obviously) love the how the digital world makes it so easy to share my experiences and adventures with fiber art and share in the experiences of others - blogs, tutorials, e-books, websites, .... And being a fiber arts junkie, I love looking through books and magazines, dreaming about what I'll work on next. And I gather way, way too much printed material - it's hard to organize and keep track of. Enter Glossi.com, a new digital magazine website that is currently in its beta testing phase. What sets Glossi apart from other sites that enable you to read magazines and catalogs online is that Glossi allows you to create your own magazines as well. How cool!! Yes, yes, I know that one can upload your own creations on other sites, however you need to get the publishing software on your own and most of them also charge fairly high yearly fees. Right now, Glossi is free - you need an invitation to join (just request one and it arrives pretty quickly).
So I decided to make my own Glossi and test out just how easy it is. Results? It's amazingly easy! There are a ton of templates you can use or make your own custom page. I pretty much just used templates.


It's pretty intuitive to figure out how to use the tool bars - if you are used to working in Word, PowerPoint, or other similar programs you won't have a problem.

After a few hours of playing around, I had my own magazine finished! I know - it's a pretty tiny one!
I can see great possibilities for sharing everything from artwork to photography (think family events and holidays!) to portfolios, student projects, ..... if any of you make your own Glossi, link to it in the comments below. I'd love to see them!!
Happy Creating! Deborah
So I decided to make my own Glossi and test out just how easy it is. Results? It's amazingly easy! There are a ton of templates you can use or make your own custom page. I pretty much just used templates.


It's pretty intuitive to figure out how to use the tool bars - if you are used to working in Word, PowerPoint, or other similar programs you won't have a problem.

After a few hours of playing around, I had my own magazine finished! I know - it's a pretty tiny one!

I can see great possibilities for sharing everything from artwork to photography (think family events and holidays!) to portfolios, student projects, ..... if any of you make your own Glossi, link to it in the comments below. I'd love to see them!!
Happy Creating! Deborah
Monday, May 13, 2013
Dyeing Kitchen Towels


I've been having lots of fun dyeing kitchen towels in beautiful forest colors! These are my favorite waffle weave type cotton towels - great for drying with. I get them from Embroider This.

These towels are dyed with Procion golden brown, forest green, chamois, and wasabi green - luscious! If you're new to dyeing, see this past post for a tutorial.

Happy Creating! Deborah
Friday, May 10, 2013
Friday Inspiration - The Fiber Art of Sandra McMorris Johnson
 |
| Gesture in Blue |
I knew when I read her quote that this was an artist I was going to love! "Fiber is simply color suspended in a cloth medium." And that describes Sandra McMorris Johnson's work perfectly. And if you've read this blog for very long, you've probably noticed that I absolutely love color!
 |
| Celebration Series III |
In her artist's statement, Sandra says that what she wants to express in her art is "the absolute beauty that is everywhere." The way she uses color to meet this goal is amazing - joyful splashes collaged together in a way that makes them almost shine with light. It's hard to pick favorites from her website's gallery, but Celebration Series III is right up there! It's worked with the hand dyed satins that are a hallmark of her work.
Be sure to take a look at her website - you'll see quilts, fabric collages, fiber pieces, installation pieces and wonderful quilted jackets she makes from hand dyed fabric.

Happy Creating! Deborah
Wednesday, May 8, 2013
Graduated Fabric Dyeing

There are several different ways to do graduated fabric dyeing (where you dye several pieces of fabric, each one a little darker than the one before) - two of the easiest are to vary the amount of dye in the dye bath or to vary the amount of time the fabric spends in the dye bath. I've had better luck with the first, so when I decided I needed graduated green fabric for a new project, that's what I did.
Materials:
* white 100% cotton fabric - I used 3 fat quarters
* Procion dye powder (I used Dharma's forest green)
* canning salt (no additives) - 1/2 cup per fat quarter
* soda ash (I use pool pH+) - 1 T per fat quarter
Find containers that are all exactly the same size - I was dyeing three fat quarters so I needed three containers. We use a lot of bottled water - the leftover bottles work great for dyeing in once the tops are cut off. And their tops turned upside down and put back into the bottle bottoms make great funnels! The bottle on the left is set up that way to show how.

The proportions I use are for fat quarters. Put 1/2 gallon water into each container. Dissolve 1/2 cup canning salt into each.

In a small amount of water, add 1/4 tsp. dye powder and stir to dissolve. Add to one of the containers. Repeat with 1/2 tsp. dye for the second container and 1 tsp. dye for the third. I usually go from 1/2 tsp. to 1 tsp. instead of 3/4 tsp. as I can't see a lot of difference in fabric color with the 3/4 tsp.

For the project I'm planning, I wanted the fabric to look mottled, so I lowered the wet fabric into the container, folding it back and forth and then squishing it down so I couldn't see it below the top of the dye. And I just left it sitting there without stirring for 20 minutes.

If I had wanted a smoothly dyed piece that was all the same color, I would have put the fabric into the container and then kept stirring and moving the fabric around during the 20 minute soak.
After 20 minutes, mix 1T soda ash in a little warm water and stir to dissolve. Add to one of the containers, stir, and let sit for 20 more minutes. Repeat with each of the other containers. Rinse fabric well and then run through the washing machine.
Here are the three fabrics again ...
... and one of them showing the mottling.

Happy Creating! Deborah
Monday, May 6, 2013
Girl's Lacy Suntop

I found some gorgeous lacy cotton at Joann's awhile ago and decided to use it on a suntop for little c. I used Burda 9552 as a base, but ended up making quite a few changes! And in showing you one of the changes, I'll also show you an easy way to make spaghetti straps.

Changes to bodice:
The two biggest changes I made were skipping the zipper and changing the shoulder straps to shoulder ties. I think the zipper needed to be there when shoulder straps were used to make the top easier to get on and off. With the ties, it should be fine.
Now onto the shoulder ties! If you've ever sewn a tube and then had to turn it right side out, you probably never tried one again. This much easier way to make tubes really should be in more instructions, but it's not. In fact, even making the straps that the pattern originally called for would be much easier with the following method.
First, I cut the ties from the strap pattern piece, making them 18 inches long. This may be too long, but I made it without little c here - I can adjust it when I try it on her by cutting off some of the end of the tie and refinishing it. When you get your ties cut out, iron them in half lengthwise.

Next cut a piece of 1/4 inch ribbon a few inches longer than the straps and lay it against the fold.

Bring the top over the bottom and sew edges in a 3/8 inch seam (or bigger if you want a thinner tie). Start at the short edge where the ribbon sticks out just a little, turn the corner and sew all the way down the long edge being careful not to catch the ribbon on this edge.

Scrunch the tie down toward the sewn bottom and wriggle it around a little so the fabric goes over the bottom seam.

Pull on the ribbon until the tie has turned right side out. Cut off the end - save the ribbon for your next tie.

Once I sewed the outside bodice together at one seam, I sewed a tie onto each shoulder on the right side.

Next sew the second side seam in the outer bodice. Sew the bodice lining at both side seams. Pin the two bodice sections right sides together and sew as the pattern instructions show. The only difference with yours now is that it will be a circle that stands up since both side seams are sewn together.

Continue on with the patterns instructions. The only thing I do differently is top stitch along the top of the bodice. I think it gives a nicer finished edge.

Sew and gather the skirt as the pattern instructions show. Now comes another change - I attach bodices differently than the pattern shows. See on the instructions how you're left with a big seam that you're supposed to press up after you sew the skirt to the bodice? There's a nicer way to do this that covers the seam up!
Attach just the outer bodice to the skirt - pin and then sew. Leave the bodice lining free.

After you've sewn it together, press the seam up. Now turn the edge of the bodice lining under 5/8 inches and pin it over the seam.

Sew the bodice lining down with a hemming stitch.

Turn the ends of the ties in just enough so that when you sew across the bottom the sewing will catch them and they won't turn back out again.

Sew in the hem and you're done! And now that I'm finished, I'm thinking I might just leave it white ... it has a nice elegance to it.
Happy Creating! Deborah
Subscribe to:
Posts (Atom)