Wednesday, August 31, 2011

Wednesday Sewing - Pillows Part 4/Piping


Today I'm finishing up the pillows I've been working on the past three weeks!  If you're following along, I'll show you how to make the pillow fronts into cases for the pillow forms and add piping.


Materials to finish one pillow:
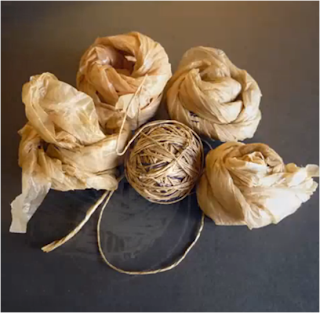
*cotton cord - see photo to the right
*2 1/2 yards of  2 inch bias cut fabric sewn together
*invisible zipper - at least 20 inches

1. Cut two 19 x 11 inch pieces from the fabric you used for the pillow front.  Sew in the zipper - see the instructions here for putting in an invisible zipper.


2.  Tack the zipper at the bottom and trim the ends.


3.  Lay pillow top on the backing fabric (making sure to center over the zipper) and trim the backing fabric so they're the same size.


4.  To make piping, cut 2 1/2 yards of bias cut fabric.  I do this by folding a 36" x 36" piece of fabric corner to corner (making a triangle) and then cutting along the folded edge to make two triangles.


6.  Fold one of the triangles in half and cut 2 inch strips.


8.  Sew strips together putting two strips perpendicular, right sides together and sewing diagonally.  Trim seam to 1/4 inch and press open.


9.  When all strips are sewn together, make piping by enclosing the cotton cord in the strip and sewing near the cord, but not as close as you could get - just almost!  We'll get really close later.


10.  Undo sewing on one end of piping, turn about 1/2 inch to the inside and begin pinning piping to the pillow front, with the piping facing in.  When you get to the other end, trim the cotton cord so it meets the cord on the other side, insert second end into the first end, and pin.


Sew along the line you previously sewed.


11.  Pin pillow back to pillow front, right sides together.  Make sure you open the zipper enough to put your hand through so you can open it up after you sew all the sides together.


12.  Turn over and sew just to the left of the sewing line you already have - this is when you want to get real close to the cotton cord.  When you get to the corners, round them instead of making a sharp turn.


13.  Trim the corners


14.  Turn right side out, press, and insert the pillow form.


Repeat for more pillows, pile them on your sofa, and enjoy!

Happy Creating!  Deborah

Monday, August 29, 2011

Monday Project - Snowflake Garland


It's been unusually hot for the end of August around here - too hot for even me!  I'm dealing with it by working on snowflakes and thinking about cold things, like snow ... Christmas ...ice ...  I wanted to make a snowflake garland last Christmas and ran out of time, which is probably a good thing since it would've been all in white thread if I had gotten it done.  This summer I found a huge amount of red and green size 10 crochet thread at Goodwill for a ridiculously low price and decided to use it in the garland.


Materials:
*size 10 crochet thread
*size 7 steel crochet hook

I used Lucy's great snowflake pattern - she has a tutorial on it here at Attic 21.  She's in England, so the directions are written with British crochet terminology.  If you're using American terminology, just substitute single crochet for double crochet.

1.  Make your first snowflake.


2.  Make your second snowflake, but stop when you have one chain loop left on your last round.  Make your first sc, chain three, sc, and make two of the five chain stitches that come next.


3.  Insert your crochet hook down through the chain 5 loop of the previous snowflake.  Hook the thread and make your next chain (the third of five) through the loop.  Make your last two chains.


4.  Now continue on finishing up the snowflake just as you did your first one - except now you have another snowflake attached.


5.  Continue making snowflakes and attaching them until your garland reaches the desired length.


I'm going to just keep going on this and hopefully will get it long enough to wrap around our tree a few times.

Happy Creating!  Deborah

Friday, August 26, 2011

Friday Inspiration - Landscape Fiber Art

I just came across an artist-in-residency project multi-media fiber artist Denise Currier worked on with elementary and junior high students in 2009.  The work is gorgeous!


Students in several Mesa, Arizona schools created these layered fiber pieces to tell of their experiences living in the Sonoran Desert.  Be sure to check out the other examples and read more on the project's webpage here.

Many curricula include the study of students' states and environments - this would be a great project for any of you teachers or volunteer parents/grandparents out there who work with fabric.  It looks like the applique pieces could be attached as I do, with Steam-A-Seam 2, or even fabric glue.  A sewing machine was used with these, adding some great texture.  If no machine could be brought in for the students to use, hand embroidery stitches could be taught - but wouldn't it be great to give all those boys and girls the chance to use a sewing machine!  I know my middle school students loved it when they got to use the one I'd sometimes bring in.

Happy Creating!  Have a great weekend and stay safe if you're in the path of Hurricane Irene.  Deborah

Wednesday, August 24, 2011

Wednesday Sewing - Designing Pillows Part 3


This week I have the second pillow (pillow B) designed and the pillow top made.  Last week I showed you how I made the first pillow in what I'm calling my monsoon set - the thunderstorm side of monsoon.  This week I'll show you how to put together the hot side of monsoon - and very appropriate, as we are having extremely hot weather for this time of year.  115 degrees today with a forecast of 116 for tomorrow.  Hmmm ....


Materials:
*3/4 yard background material - includes material for pillow A
*fat quarters or fabric scraps
*Steam-A-Seam 2
*18 inch square pillow form
*patterns found here

If you remember from two weeks ago, this is the sketch I worked from for this pillow.


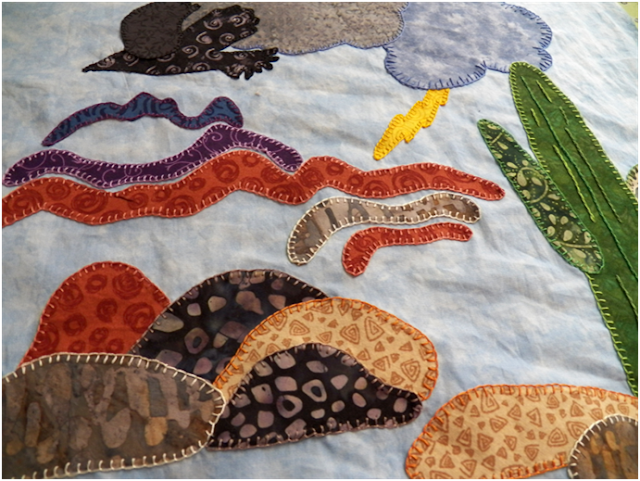
I decided to make a few changes.  Since this is the heat part of monsoon, I wanted everything to be very still - not much movement at all.  So now there are only two birds and they're standing very still.  Birds do that down here in the heat - sometimes we have a dozen in the shade under our trees, looking like statues.  I knew from the first pillow, that I needed a background, so I added a couple of curvy mountain ranges.  But since I'm going for stillness, I left them gently curving.  And I also added a cloud to tie this design to the one in pillow A.  The final change was moving the larger of the heat rays coming off the sun to the inside of the pillow - this was done mostly because it balanced the composition better.  It felt right.

1.  Follow the instructions from last week for transferring the pattern pieces to Steam-A-Seam 2 and then cutting out them out from fabric that I go over in last week's post.  Cut a 19 x 19 inch piece of background fabric, take the backing off the fabric pieces and begin arranging them using the picture below as a guide.


2.  Iron to set the pieces on the backing (about 15 seconds on cotton setting).  I used a blanket stitch to embroider around the raw edges.  You can do this or use a zigzag machine stitch.


Like on the clouds from pillow A, I did a two level blanket stitch on pillow B's cloud.


Next week we'll get these pillows put together!

Happy Creating!  Deborah

Monday, August 22, 2011

Monday Project - Embroidered Marigolds


 This past spring, like usual, I planted quite a few pots of marigolds.  My favorites are the two toned darker flowers with a lighter orange shot through!  It's usually a pretty good flower for our summer heat, as long as it gets shade for part of the day and I keep it well watered, and most summers most of my pots make it.  But not this year ...  I've been missing those bright orange spots in my yard, so when I dyed one of my thrift store white shirts a nice turquoise and was trying to think of what to embroider across the bodice, I decided on marigolds.  Plus, orange looks so nice on turquoise - being a complementary color really makes it stand out!


Materials:
*something to embroider on!  I dyed the white, cotton knit shirt I had with Procion turquoise.  If you're new to using this, see this past post here.  I didn't want as vibrant a turquoise as this usually gives, so I used about 3/4 of the called for dye.
*embroidery thread - dark rusty orange, a lighter rusty orange, deep yellow, cream, green

1.  First, I embroidered basic flowers across the bodice using a daisy stitch, 2 strands of thread, and the lighter orange.  I tried not to space them evenly - just sort of haphazardly.


2.  Next, I went back and added additional flower petals using the darker orange.  I then embroidered additional flowers scattered among the ones already there.  This time I used the darker orange ...


3. ... and went back and added additional flower petals using the lighter orange.


4.  Using the cream and 1 strand of thread, I added airborne flower seeds by making two daisy stitches and putting a stem at the bottom with one running stitch.


5.  I added leaves, using the green, daisy stitches, and two strands of thread.


6.  Last, I put 1 to 3 french knots in the center of each flower, using the yellow and two strands of thread with three wraps.


And tada!  I'm ready to face the rest of summer's heat with my new marigold shirt!


Happy Creating!  Deborah

Friday, August 19, 2011

Friday Inspiration - Plarn!


A few months ago, our newspaper started getting delivered in bright plastic sleeves - being the color freak I am, I immediately started hoarding them!  Can you believe in all that time we've only gotten one purple sleeve?  My plan was to make "plarn" (plastic yarn) from them and then crochet some wonderfully colorful creation.  After a few days of surfing the web for ideas, I'm mainly underwhelmed and overwhelmed!  Unfortunately, some of what's out there reminds me of crochet's non-glory days in the 1970's.  And fortunately, there are some amazing things being done with plarn that I can't even begin to imagine doing myself.


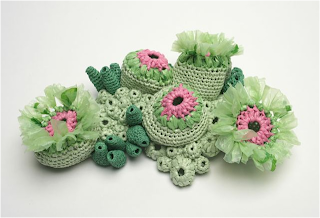
Actinia


If you haven't run across Helle Jorgensen's plarn sea creatures and coral reefs, definitely take a look right now!  I would never have believed such beauty could be created with plastic sacks.  If you're thinking of trying your hand at plarn creatures, she has a tutorial on how to make the yarn.


Instructables has a great tutorial on making a plarn betta fish to get you started. 


I had something more like a bag in mind for my precious stash, though.  Two that really stood out to me were this multi-colored, striped bag from UrbanSustainableSociety ....


... and the bag Rachel Schell crocheted with a few modifications from the pattern by Nancy Livengood.  Rachel also has a plarn making tutorial on her site. 


 If you're a spinner, I came across an intriguing video on how to make spun plarn on TrendHunter.  It was done with a drop spindle - something I've yet to try.


And if you're ready to be challenged, rather than simply inspired, this is interesting - spun newspaper yarn from Green Upgrader.  I have no idea how durable it would be, but when I finally get around to trying spinning, I'll make some to test out.  We recycle a lot of newspapers!


Happy Creating!  Deborah

Wednesday, August 17, 2011

Wednesday Sewing - Designing Pillows Part 2


Last week, I began designing a southwest themed pillow.  This week, I'm starting to put it together!  By the time I'm done, I'll have two different pillows - I'm calling the pillow I'm working on this week pillow A.

Materials:
*3/4 yard background material - includes material for pillow B
*fat quarters or fabric scraps
*Steam-A-Seam 2
*18 inch square pillow form
*patterns found here

 So when I finished with last week's blog post, I was on my way to the fabric store to buy a few colors I needed but amazingly did not have.  While I was there, I found a lighter blue I decided would be better for the background.  I like to use solid, but not quite solid colors for backgrounds - this one has a lighter shade splotched through it.

1.  Print out the patterns and cut them out.  Turn them over and trace each shape onto Steam-A-Seam 2.  Separate the pieces.


2.  Iron each piece onto the back of its fabric.  Cut each piece out.


3.  Cut a 19 x 19 inch piece of background fabric.  Peel the paper off each piece and begin arranging on your background.  Further down, I have a guide for where to put the mountain and rock pieces.


4.  When I finished sticking the pieces in their places, this is what I had:


5.  I purposely didn't put any ground or background in, thinking that I wanted it to look a little "floaty."  I was wrong!  I didn't like that big, empty space, so I added in the suggestion of mountains.


6.  Much better!  Iron the applique pieces onto the fabric and finish the edges.  I used blanket stitch embroidery on my edges to give it a folk art look, but if that's not your thing you could use your machine and a short, tight zigzag stitch like I did in this project.


I also added stripes on the body of the cactus, using an outline stitch.


And here's the guide for placing the mountain and rock pieces:


Next week, I'll show you what I did with my second design, and the week after that we'll put them together into pillows.

Happy Creating!  Deborah