
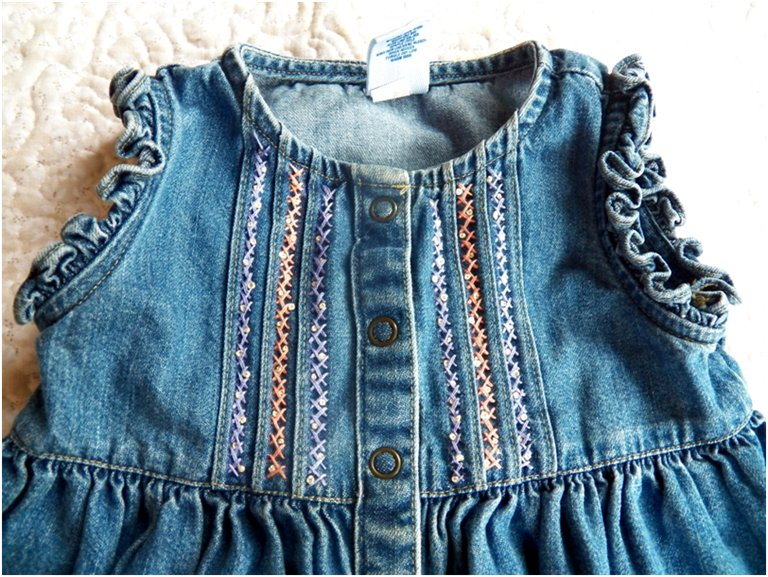
A couple of weeks ago, I decided to start using more embroidery stitches than my usual outline stitch, lazy daisy, and french knots. Last week I showed you what I did with bullion stitches, this week I finished embroidering on a denim dress for little c using a herringbone stitch.
Herringbone stitches work very well for covering seams in crazy quilts or filling in long expanses, like I had on this dress. I worked it in two different colors and then filled in with french knots to add a little more pizazz.

Here's how to work this stitch:
1. This is one stitch that is much, much easier to do if you draw parallel lines first. I use a disappearing fabric pen, but chalk would also work. Bring your needle up at the left end of your piece.

2. Hold the embroidery thread where you want it to intersect the top line. Insert the needle under the thread and come up directly over the last spot on the bottom line you came up.

3. Your work should look like the picture on the left. Next, hold the thread where you want it to intersect the bottom line. Insert the needle under the thread and come up directly under the last spot on the top line you came up.

4. Your work should look like the picture on the left. Repeat - hold the thread where you want it to intersect the top line.

5. Insert your needle under the thread and come up directly over the spot on the bottom line you last came up.

6. Your piece should look like the picture on the right. Repeat to the process ...

7. And keep repeating until you reach the end of your lines.


Happy Creating! Deborah
very well,how easy & cute,hmmm
ReplyDelete