

Last summer, little c's mom was given a hand towel bib that worked great with little c. It slipped easily over her head, but not so easily that it had big gaps for food to slip down. It covered her well. And it had no velcro that would get caught in her hair and make her upset! There are several tutorials on the web for these types of bibs, but everything I tried didn't turn out as well as that original bib or was way too complicated for such a simple item. So ... off and on during the fall I worked on coming up with one and finally had to put it aside for Christmas. The other day I found my original notes and measurements on the bib and gave it another go. I bought a clearance hand towel at Joann's (for Valentine's Day, but it'll work still) and for some reason, this version finally turned out the way I wanted it to!
Materials:
*Hand towel with a nice design
*small amount of rib knit fabric or the neck ribbing from an old T shirt
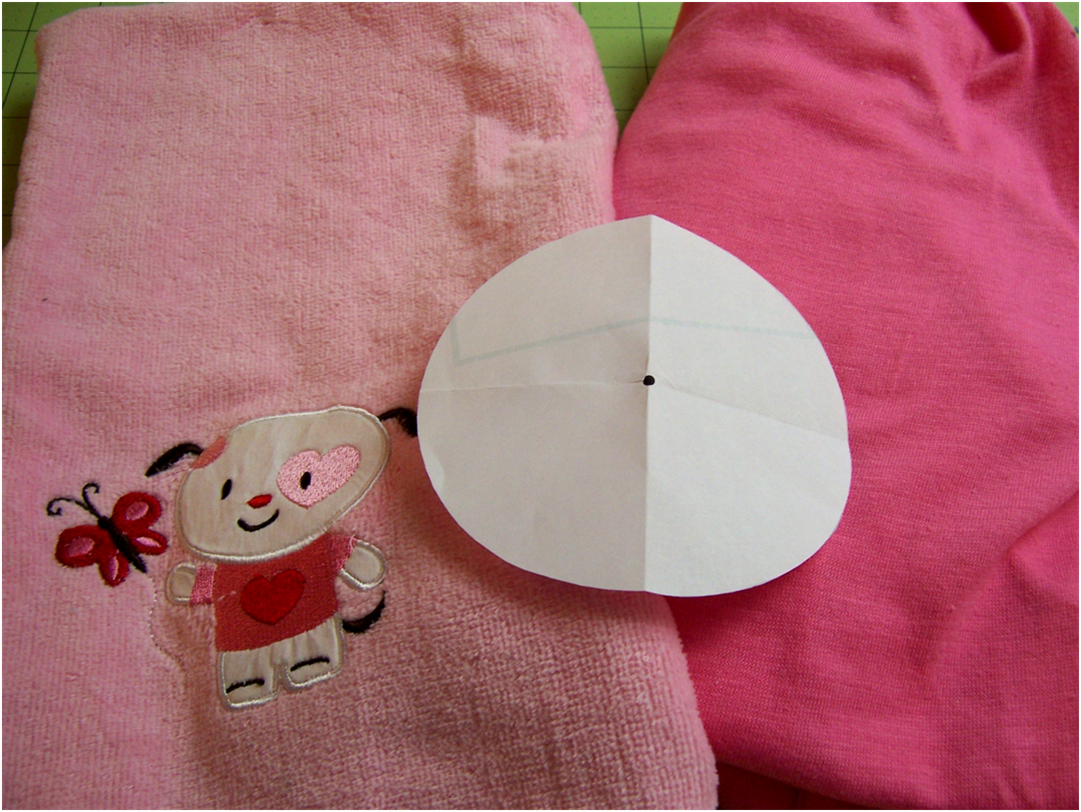
*neck hole pattern found here
1. Cut out the neck hole pattern and fold into fourths. Crease the lines and open back up.
2. Measure the length of your towel. You want the bib to about 22 - 24 inches. My towel was 27 inches and I wanted the bib to be 22 inches when finished, 23 inches before I put in a 1 inch hem. I cut off 4 inches. Cut off any tags.

3. Cut a piece of rib knit fabric 2 1/2 by 12 inches or use a 12 inch piece of neck ribbing from an old T shirt. If you're using the fabric, fold in half wrong sides (the wavy looking side, not the straight lines) together and zigzag stitch over the edges, being careful not to stretch the fabric as you sew.

4. Pin ends of the ribbing together. Fold under on the rough edge of the towel, fold again and pin.

5. Sew ends of ribbing together in a 1/8 inch seam. Press seam to one side and topstitch on the outside, so the seam lies flat.
Topstitch on the outside of the towel.

6. Fold towel in half lengthwise. Fold bottom up 1/3 of the way. Fold the top down.

7. With chalk or a disappearing fabric pen, make a mark in the upper right corner where the arrow indicates.
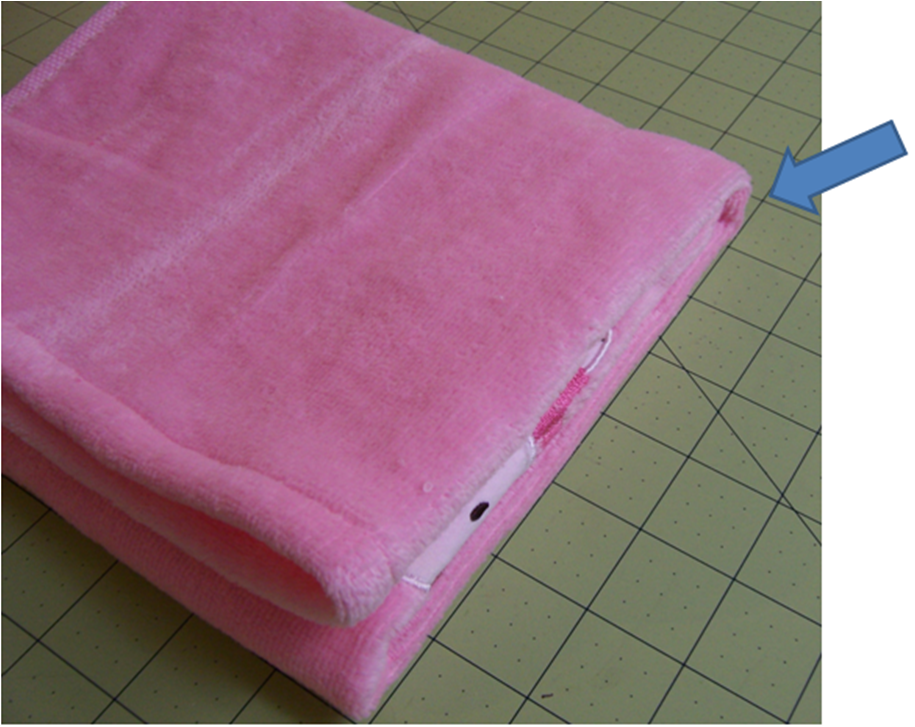
8. Your mark should be about here.

9. Lay the neck hole pattern on the towel so that the mark you made lines up with the dot in the middle of the pattern. Adjust the pattern position so it is an equal distance from each side and trace around it.

10. Cut the circle out.

11. Pin the ribbing to the neck hole edge. The easiest way I found to do this is to 1) use the crease lines you made on the neck hole pattern to divide the neck hole into quarters - make marks at the back, front, and two sides, 2) mark the neck ribbing in quarters, using the back seam as the back mark, 3) pin the back seam of the ribbing to the back mark on the towel and then pin the front and sides of the ribbing to the corresponding marks on the towel, 4) pin the rest of the neck ribbing to the neck hole edge, being careful not to stretch it.

12. Stitch together in an 1/8 inch seam using a zigzag stitch or serger. If you're not using a serger (and I'm not), when you get around the neck and back to where you started, keep sewing a second time but this time zigzag over the edge so you catch it up in the stitching.
13. The seam you end up with sticks up and will be uncomfortable, so press it down away from the ribbing, turn the bib over, and topstitch on the towel close to the ribbing.

Ta da! Success!

I tried making these with terry fabric and had trouble hemming the edges without getting ripples - it can be done, but with more work than I want to do for bibs! So I'm thinking of getting some plain white hand towels and trying some surface design techniques used in making complex cloth. Little c will have art bibs!
Happy Creating! Deborah
I love these and this one is super cute! Thanks for such a great tutorial, I'll be linking.
ReplyDeleteYour bib looks super cute! How old is Little C? I want to make some for my little nephew but I don't think his head is going to fit through that circle. Thanks for the pattern!
ReplyDeleteThank you! Little c is 13 months old - the ribbing around the neck let's the opening stretch a long ways!
ReplyDeleteYour directions are great and I'm ready to go -- except for the neck opening. The pattern won't print actual size. Could you please tell me the diameter of that circle? Thanks!
ReplyDeleteOh my! Something happened to my older patterns - Google Docs just changed to Google Drive, I wonder if that did anything to them? Anyway, the diameter of the circle should be 5 1/2 inches. Now to work on seeing if I can fix this!
DeleteThank you for the quick reply!!
ReplyDelete