Friday, February 18, 2011

Friday Inspiration - The Kimono Art of Itchiku Kubota


"What I respect, admire, and love the most are the aspects of nature.  The sun, moon, stars, clouds, snow and rain, mountains, rivers, trees and plants, the brilliance of gems -- all natural phenomena provide the source of ideas."  1979, Itchiku Kubota


Ohn - Mt. Fuji


It's hard to even begin describing the art of Itchiku Kubota.  It feels like there just aren't the right words to use when talking about the masterpieces he created on silk.  He used dye, stitching, embroidery, and inks, bringing life to his visions of color and light in ways that leave one in awe.  To start understanding how he did this, one must look at the journey his life took.  Along the way I've posted a few pictures of his work.  Clicking on them will take you to Gwendolyn Magee's Textile Art Resource Guide's view of the closeup shots, showing the intricate details.  Her site has more of the kimonos, all with closeup links, so be sure to take a look at it.


Kubota was born in Tokyo in 1917.  When he was fourteen, he apprenticed to a kimono artist and began learning the different dying and embellishment techniques used on silk.  At age 20, on a visit to the Tokyo National Museum, he saw a silk remnant dyed with a technique used in the late 15th to early 16th centuries known as tsujigahana.  By the 1900's, this technique was a lost art.  Kubota was so moved by this experience, he vowed to rediscovered its methods.

San - Burning Sun


World War II intervened, however, and Kubota became a prisoner of war in a Siberian camp.  His later work, San - Burning Sun, uses the colors and light he remembers from that camp.  On his release in 1948, he returned to his quest.  After years of work, he came to the conclusion there were too many technical problems involved with recreating tsujigahana as it was originally practiced and developed his own technique using modern silk crepe fabric and synthetic dyes - he named it Itchiku Tsujigahana.  An interesting explanation of the basic steps can be found here.


From Win


Kubota's last years centered around creating his Symphony of Light series.  He envisioned it showing a landscape that flowed from piece to piece, beginning with Spring and ending with Winter.  Using eight foot non-functional kimonos, Kubota completed 30 of the envisioned 75 pieces by the time of his death in 2003.  Today, his daughter and son continue his work.

In 2009, a touring exhibit of his completed Autumn and Winter kimonos made stops at the Canton Museum of Art.  A review found here has an example of how three Autumn kimonos are viewed in sequence and a San Diego Union-Tribune article here has more examples of kimonos in the exhibit.  A video promoting the tour can be watched here - it's definitely worth viewing to here Kubota talk of his fateful viewing of the tsujigahana dyed silk remnant and get a few peeks at the exhibit.


And while it's not the same as being there, the exhibit catalog is still available on Amazon here.

As I contemplate (yes, still!) my next layering technique for the complex cloth I'm working on, I could have no better inspiration than Itchiku Kubota.

Happy Creating!  Deborah

Wednesday, February 16, 2011

Wednesday Sewing - Hand Towel Bib


Last summer, little c's mom was given a hand towel bib that worked great with little c.  It slipped easily over her head, but not so easily that it had big gaps for food to slip down.  It covered her well.  And it had no velcro that would get caught in her hair and make her upset!  There are several tutorials on the web for these types of bibs, but everything I tried didn't turn out as well as that original bib or was way too complicated for such a simple item.  So ... off and on during the fall I worked on coming up with one and finally had to put it aside for Christmas.  The other day I found my original notes and measurements on the bib and gave it another go.  I bought a clearance hand towel at Joann's (for Valentine's Day, but it'll work still) and for some reason, this version finally turned out the way I wanted it to!


Materials:
*Hand towel with a nice design
*small amount of rib knit fabric or the neck ribbing from an old T shirt
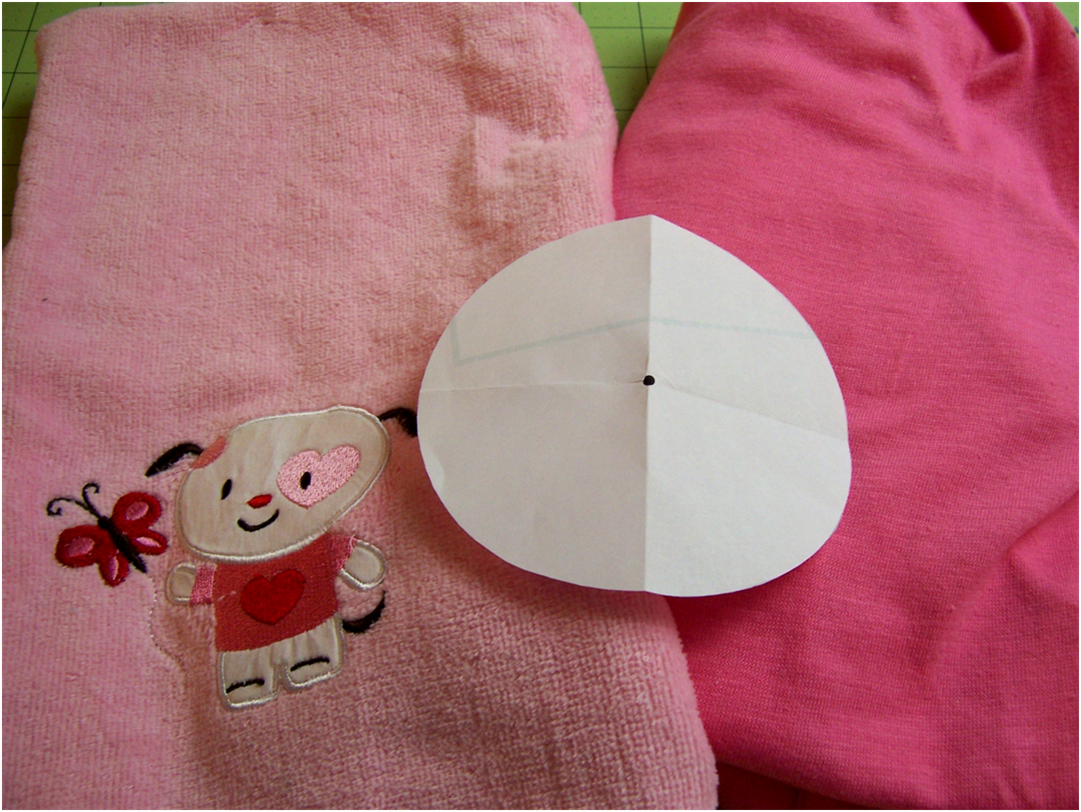
*neck hole pattern found here

1.  Cut out the neck hole pattern and fold into fourths.  Crease the lines and open back up.

2.  Measure the length of your towel.  You want the bib to about 22 - 24 inches.  My towel was 27 inches and I wanted the bib to be 22 inches when finished, 23 inches before I put in a 1 inch hem.  I cut off 4 inches.  Cut off any tags.


3.  Cut a piece of rib knit fabric 2 1/2 by 12 inches or use a 12 inch piece of neck ribbing from an old T shirt.  If you're using the fabric, fold in half wrong sides (the wavy looking side, not the straight lines) together and zigzag stitch over the edges, being careful not to stretch the fabric as you sew.


4.  Pin ends of the ribbing together.  Fold under on the rough edge of the towel, fold again and pin.


5.  Sew ends of ribbing together in a 1/8 inch seam.  Press seam to one side and topstitch on the outside, so the seam lies flat.

Topstitch on the outside of the towel.


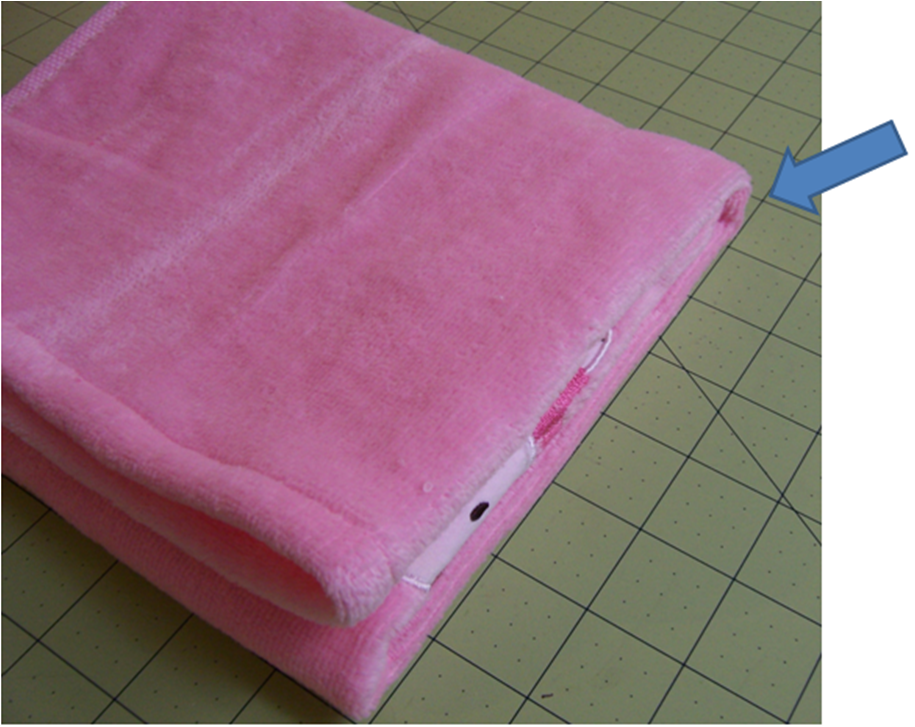
6.  Fold towel in half lengthwise.  Fold bottom up 1/3 of the way.  Fold the top down.


7.  With chalk or a disappearing fabric pen, make a mark in the upper right corner where the arrow indicates.


8.  Your mark should be about here.


9.  Lay the neck hole pattern on the towel so that the mark you made lines up with the dot in the middle of the pattern.  Adjust the pattern position so it is an equal distance from each side and trace around it. 


10.  Cut the circle out.


11.  Pin the ribbing to the neck hole edge.  The easiest way I found to do this is to 1) use the crease lines you made on the neck hole pattern to divide the neck hole into quarters - make marks at the back, front, and two sides, 2) mark the neck ribbing in quarters, using the back seam as the back mark, 3) pin the back seam of the ribbing to the back mark on the towel and then pin the front and sides of the ribbing to the corresponding marks on the towel, 4) pin the rest of the neck ribbing to the neck hole edge, being careful not to stretch it.


12.  Stitch together in an 1/8 inch seam using a zigzag stitch or serger.  If you're not using a serger (and I'm not), when you get around the neck and back to where you started, keep sewing a second time but this time zigzag over the edge so you catch it up in the stitching.

13.  The seam you end up with sticks up and will be uncomfortable, so press it down away from the ribbing, turn the bib over, and topstitch on the towel close to the ribbing.


Ta da!  Success!


I tried making these with terry fabric and had trouble hemming the edges without getting ripples - it can be done, but with more work than I want to do for bibs!  So I'm thinking of getting some plain white hand towels and trying some surface design techniques used in making complex cloth.  Little c will have art bibs!

Happy Creating!  Deborah

Monday, February 14, 2011

Monday Project - Dyeing with Shaving Cream


Today I'm beginning a series of Monday posts on creating complex cloth.  If you're not sure what that is, see last Friday's post here.  The first step is to create a background for your fabric.  There are countless ways this can be done - some I've covered so far in this blog are dying and sun printing.  Today we're looking at using shaving cream with dye.  Shaving cream softens the dye and allows you to create swirls, stripes, whatever more easily.


Materials:
*fabric - I'm using 100% cotton.  If you use a fabric other than rayon, you need a different type of dye than I'm using.
*dye - I'm using Procion fiber reactive dye.  Any dye that works on cotton will do, but I think Procion gives much richer color.
*dye chemicals/mask/gloves - for Procion dyes, you'll need soda ash.
*mixing cups - I use clear plastic cups.
*brushes - foam works well for spreading the shaving cream, foam or larger bristle brushes for the dye.
*shaving cream - if you're like me and don't do well with scents, CVS pharmacy has a good unscented shaving foam that is cheap.
*thin plastic - painters' dropcloth works well
*tape - I use artist tape as it doesn't leave any stickiness on the fabric


If you haven't dyed fabric before, look at this blog post first - I cover the basics.

1.  Soak your fabric in a soda ash solution of 1 cup soda ash to 1 gallon warm water for at least 20 minutes.  Let the fabric dry to at least slightly damp.  While the fabric is soaking, mix up your dyes.  For Procion, I use 2 tsp. dye powder (4 tsp. for colors with a * and 8 tsp. for colors with **) to 1/2 cup water.  Procion mixes more easily if you first add a bit of water and make a paste before adding the rest of the water.  I suggest putting the cups of dye in a pan with sides because no matter how careful you are, this happens -


 and will cause a huge mess.  Even if it touches fabric that hasn't been soda ash treated, it will NOT come out.  I know this from experience.

2.  Lay the fabric on a couple layers of plastic and tape down.  Leave enough plastic so you can fold it over and cover the fabric at the end.


3.  Spray until damp.


4.  Paint on the dye.  You can just randomly place it around or try a plan.


5.  Spray on shaving cream and ...


spread it around.  How you spread it will affect the end result - stripes, swirls, zig zagging, whatever.


6.  You can add more dye and keep spreading the shaving cream around until you decide you're finished.


7.  Fold plastic over the top and press down, making contact with the shaving cream and sealing it.


8.  Set aside and leave for 24 hours.  Rinse well, wash and dry.


Here are three more I worked on.


With this fabric and the next piece, I wanted more muted colors so I mixed 3 tsp. of the mixed dye with another 1/2 cup of water and put a thin layer of shaving cream on the fabric before I put the dye down.


So --- the plan now is to intently gaze at these pieces and decide what fabric technique to use for the next layer!  I'll show you what I decided next Monday.


Happy Creating!  Deborah

Friday, February 11, 2011

Friday Inspiration - Complex Cloth

What is complex cloth?  A few different things.  Complex cloth is layering different methods of fabric design in a way that gives you a beautiful, complex design with depth, texture, and interest.  While it can be broken down into the separate techniques used, it becomes bigger than the sum of its parts.  Complex cloth can be a piece of art that stands on its own or the material for another piece of art - art quilts, wearable art clothing, books, .....

The processes used are often simple in themselves - putting dye on, taking dye off, printing, stamping, stenciling, resists, painting, and often cutting apart and reconstructing.  Somehow all these simple processes used together give amazing results, much as collage processes can.

Joy Lavrencik, Testing Again


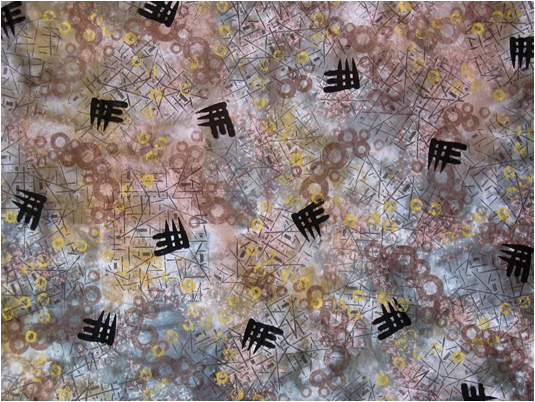
There are many good examples on different fabric artists' websites.  Joy Lavrencik created Testing Again on cotton by dying, overdying, discharging, printing, and painting in multiple layers.  The Art Cloth Network has more wonderful examples of her work.


Marie-Therese Wisnioski, Cultural Graffiti VI


Australian artist Marie-Therese Wisnioski has an in depth website showing many of her techniques and chronicling the many classes she teaches.  In creating Cultural Graffiti VI, she used disperse dyes, pigments, transfer techniques and silkscreening on satin.


Complex Cloth is also the name of a book by fabric artist Jane Dunnewold that, with her most recent book, Art Cloth, instructs in fabric surface design techniques.  Jane is an avid supporter of complex art cloth who regularly exhibits and blogs (here) about it.


Her Art Cloth Challenge blog is a fascinating record of how 12 different fabric artists were sent a basically identical piece of cloth and created 12 completely different pieces of complex cloth from it.


And here is a piece of complex cloth by Jane. 


I've been surface designing fabric for years and have sometimes done a little bit with layering two and sometimes three techniques, but in limited ways.  Now I've decided to try complex cloth and see what I can come up with!  Monday, I'll show you how I added my first layer to the cloths I'm working on.  I have no idea how these will turn out, so I'm going to work on several at the same time in the hopes I'll get at least one that I love!

Happy Creating!  Deborah