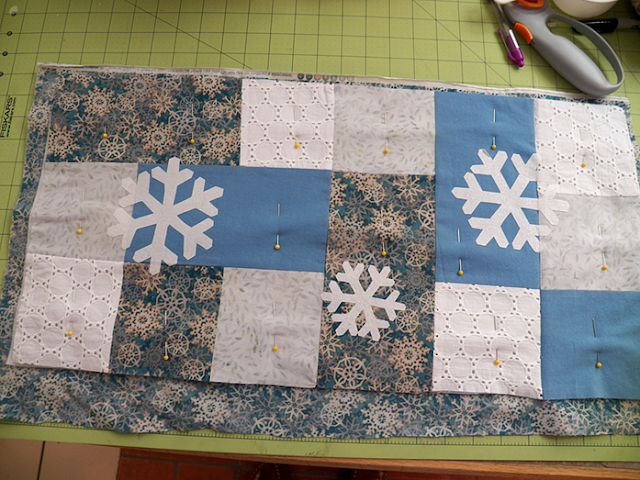
Here's an easy patchwork table mat that looks nice left out even after all the other Christmas decorations are put away.
Materials:
*1 yard of fabric A (you'll be using this for the backing and the binding, if you make your own binding)
* fat quarter of fabric B, C, and D and snowflake fabric
*Steam-A-Seam II (Lite or regular)
*fusible felt or batting
*snowflake pattern found here
Cut the following pieces:
Fabric A (snowflake): 1 piece 8 1/4 x 4 1/4 inches
1 piece 8 1/4 x 4 1/2 inches
1 piece 4 1/4 x 4 1/2 inches
Fabric B (blue): 1 piece 8 1/4 x 4 1/2 inches
1 piece 8 1/2 x 4 1/2 inches
1 piece 4 1/4 x 4 1/4 inches
Fabric C(leaf): 4 pieces 4 1/4 x 4 1/2 inches
Fabric D (eyelet): 4 pieces 4 1/4 x 4 1/2 inches
Here's a chart showing where you'll be placing the pieces:
Use a 1/4 inch seam throughout.
1. Sew the 8 1/4 x 4 1/4 inch Fabric A to a Fabric D. Sew a Fabric C to the 8 1/2 x 4 1/2 inch Fabric B.
2. Sew the two strips together as shown below.
3. Sew a Fabric D, a 4 1/2 x 4 1/4 piece of Fabric A, and a Fabric C together.
4. Sew strip to the other two you've sewn together as shown below. You have your first square finished.
5. Sew a Fabric C to the last Fabric A and a Fabric D to the last Fabric B.
6. Sew the last pieces of Fabrics D, C, and B together as shown below.
7. Sew the first two strips together as shown below.
8. And sew the last strip on as shown below. This is your second square.
9. Sew the two squares together.
10. Cut out the snowflake patterns and trace 2 large and 1 small onto a piece of Steam-A-Seam II. Fuse onto the wrong side of the snowflake fabric.
11. Cut out snowflakes, remove backing, and fuse onto the table mat front.
12. Fuse the fusible felt onto the back of the backing fabric and pin together with the table mat top.
13. Quilt by "stitching in the ditch" (stitch in the seam lines) and sewing around the snowflake edges with a very small zigzag stitch.
14. I like to round my corners.
15. Add bias tape seam binding.
Happy Creating! Deborah


I LOVE IT!! I've never seen anyone use eyelet in their winter designs before, but this is a truly unique idea! This will look great with my snowman collection this winter! Thank you for sharing it!
ReplyDelete