This week I've added carrots to my felt food project.
Materials:
*orange and green felt
*orange, light green, and rust embroidery thread
*fiberfill stuffing
*patterns found here
1. Using the patterns, for each carrot cut 2 of carrot 1, 2 of carrot 2, and 8 of the leaf. Sew carrot 1 pieces together on the wavy edge using a narrow seam. Sew carrot 2 pieces together on the wavy edge using a narrow seam. Join the two pieces together sewing along the straight edges. Turn right side out.
2. Stuff with fiberfill. Using 2 strands of orange thread, baste around the top. Pull thread tight, closing opening. Sew across the opening.
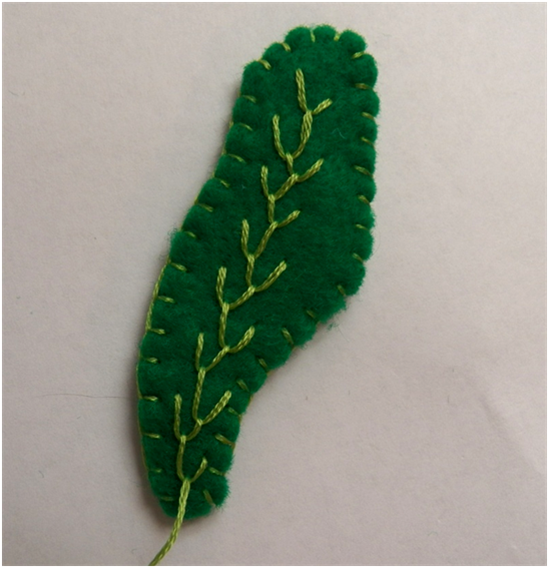
3. Sew leaves by putting two pieces together and joining with a blanket stitch, using 3 strands of light green thread.
4. Embroider down each leaf with a feather stitch. Bring needle up at the top of the leaf.
5. Hold thread down on leaf. Insert needle down to the right of it and bring up next to the thread. Pull needle through.
6. Hold thread down. Insert needle down to the left of it and bring up next to thread. Pull needle through.
7. Repeat, alternating bringing the needle up on the left and right sides, until you have reached the bottom of the leaf.
8. Without tying off thread, sew leaf to top of carrot with several stitches.
9. Repeat with all four leaves. With 3 strands of rust embroidery thread, sew lines in the carrot body using an outline stitch and single stitches. Pull stitches tightly to give a slightly puckered look.
Happy Creating! Deborah


These are so cute! I'm loving your felt food projects! I'll be linking.
ReplyDeleteWhat's Easter without a few carrots? These are also fun as toys for children to pretend to eat their veggies!
ReplyDelete