Creating Everyday Art
Monday, March 21, 2011
Monday Project - More Work on Complex Cloths
I have declared two of the complex cloths I've been working on finished! One seemed to just flow. The other ... I pretty much fought with the whole time. But in the end, I loved it!
Lighter/Multi-colored Cloth
When we last saw this cloth I had used a bleach pen to make squiggles all over. It needed something more. I took tape (I use artists' tape because I don't think it leaves a sticky residue like masking tape does) and made two stripes going both ways, leaving empty rectangles and squares.
I put discharge paste in those rectangles and squares.
When it dried, I ironed until all the color was gone from those areas.
I then painted on thickened purple and turquoise dyes on the rectangles and mixed the two dyes together for the squares. After sitting in plastic overnight, I washed it out and :
I really like this one! Here's the progression it went through:
Darker Cloth:
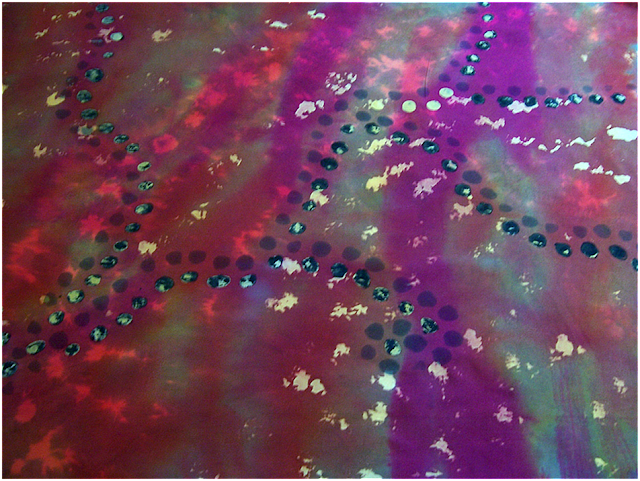
This cloth was a problem all along! Dye wouldn't set, paint wouldn't stick, discharged areas wouldn't stay white - it's the same fabric as the others, so I don't know what was going on with it. When we last saw it, I had just added gray, shadowy marks with thickened dye. They were supposed to be triangles, but the dye wasn't thickened enough and spread. Oh well.
Next I painted on discharge paste in circle shapes next to the shadowy circles. When dry, I ironed them until white, washed it and everything looked great. Whew, I thought - the curse was over. Nope. I painted the white circles with thickened gray and black dye, set it overnight in plastic, washed it out the next day and ..... the dye didn't set and the circles came out yellowish. When things don't work, I usually have some clue as to what went wrong. Not this time.
So I painted them with gray and black fabric paint - a mixture of Versatex and Peebo watered down and rubbed in with a q-tip. Because everything kept washing out, I put the paint on thicker than I really wanted it to be and ironed the painted areas for about 5 minutes each. By this point I didn't know if I even wanted to look when it came out of the dryer! Well .... this time the paint set. Boy did it ever set! It was just as dark as when I painted it, so it was darker than what I'd had in mind and I decided to work on it later.
Then .... I turned it over to fold it up and !!!! The backs of the painted circles were gorgeous! I'm done and I love it. I could never repeat it, which makes it even better!
Here's the progression it went through (minus photographs of the dye not setting several times - I was too disgusted at the time to take photos):
Now it's time to start thinking about what to do with them!
Happy Creating! Deborah
Subscribe to:
Post Comments (Atom)


No comments:
Post a Comment