Creating Everyday Art
Monday, August 23, 2010
Monday Project: Stamping on Fabric
Today we're continuing with ways to use fabric paint after last Monday's post on stenciling. Above is a table cloth I'm working on, stenciled and using barkcloth as inspiration. The sunflowers and leaves are stamped on - I'll show you how further down!
Materials List:
*100% natural piece of fabric or clothing (see this blog post for explanation and exceptions)
*fabric paint (see last week's post for choices)
*stamp pad
*carving material, such as Safety-Kut
This is like a giant eraser and made to be carved with linoleum carving tools.
*linoleum carving tool
*brayer - for rolling ink onto your carved stamps, they come in soft rubber and hard. I like the soft.
*printing plate - a piece of flat acrylic works well (that's what mine is, so it seems to have turned invisible in the photo). Anything that is smooth and can be washed off works.
*stamps - made or bought
*misc. - craft sticks, toothpicks, paint brushes, scissors, pencil
Printing materials can be found at art stores or several on-line companies. I've had good luck with Nasco and Dick Blick. The links will take you to their soft carving blocks.
Making a Stamp and Printing With It:
1. I made a sugar skull inspired stamp to print on one of the shirts I stenciled last week. You can get the pattern and a couple others here. First draw your design. If you are using a printed design, trace over all the lines in pencil. We're going to use an easy transfer method!
2. Lay the drawing upside down on top of a printing block. Rub hard on all areas of the paper with something like scissors handles.
3. This should transfer the pencil lines on the drawing to your block. Carefully lift up a corner of the paper and see if this happened. If there are gaps, put the paper back down and rub some more. When the design is transferred, I like to go over the parts I want to print with a black Sharpie. These will be the parts I do not carve away - they will stick up and collect the fabric paint.
4. Keeping your steadying hand and fingers behind the carving tool, carve away all of the white parts, going down about 1/4 inch. You can make life easier by just cutting off the large blank corners with scissors - save these parts for other stamps! When you think you have carved all white away, make a print with a stamp pad. You'll see black lines that you probably don't want on your final print! Carve these away (it's easy now because they got inked) and test again until it looks how you want it to.
5. Put a line of fabric paint on your printing plate - mine's clear acrylic, so it looks like I'm printing right on the counter. I'm not!! Roll the brayer back and forth in several directions to get the entire brayer covered. Don't roll it all over the printing plate though - your purpose here is to cover the brayer.
6. Roll the inked brayer over your stamp until all areas that remained sticking up are covered in fabric paint.
7. If this is the first time you've printed this way, it'd be a good idea to make a few prints on paper until you feel like you've got the hang of it. When ready with an inked stamp, place it down on the fabric - go straight down and don't let the stamp wiggle or move in any way. Press down on the stamp in every area a couple of times. Lift the stamp straight off the fabric in one motion.
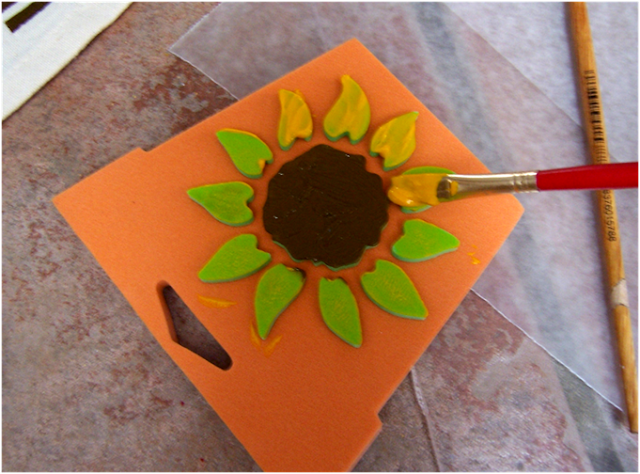
8. I often use very small stamps, such as this flower. Don't try to use the brayer to ink small stamps. Just press the stamp into the fabric paint and print. Sometimes I do use the brayer to mix, especially if I want to have a multi-colored paint to stamp with.
On my turquoise shirt, I've used stamps I carved and pieces of stamp material that I just cut into small shapes.
You can also use purchased stamps. The stamps sold for using with stamp pads and ink sometimes work and sometimes don't. If they have tiny little lines, they probably won't work - the thick fabric paint clogs them up. The larger foam stamps work well. I usually paint the colors onto them, though, instead of putting it on with the brayer.
Troubleshooting: If paint gets down in the stamp, use a toothpick to remove it. If you don't end up getting everything printed, just use a paintbrush to fill in the missing areas.
Stamping With Other Things:
Be creative! Look around and see what else you can stamp designs onto your fabric with. One of my favorites is bubblewrap.
I like to mix different colors of paint on a printing plate, fill the brayer, and roll it onto the bubblewrap.
Press it onto the fabric, re-ink, repeat until your fabric is filled.
To add a deeper pattern, use another size of bubble wrap in another color and print over the top of what you've already done.
This is a piece of cotton I'll stamp over and use in a quilted project.
Alright! Week three is done - we've dyed our fabric and stenciled and printed on it. Next week, we'll wrap it up with a couple of techniques that pull everything I've been doing on my T-shirts together. Here's what they look like now:
Happy Creating! Deborah
Subscribe to:
Post Comments (Atom)


No comments:
Post a Comment