Creating Everyday Art
Wednesday, September 22, 2010
Wednesday Sewing - Felt Wallet with Invisible Zipper
This felt wallet/clutch is a good project for practicing invisible zipper insertion. I really like invisible zippers - they're easy to put in (as long as you have an invisible zipper foot) and make a nice, smooth seam. They don't seem to be used as much as they used to be and don't come in a huge assortment of sizes and colors like regular zippers do. It doesn't matter if you get an invisible zipper that's too long - you just shorten it. For color, if you can't match the fabric you're sewing, get a zipper with a pull that coordinates with your fabric. The pull is the only part that shows. Next week we'll look at putting invisible zippers in clothing.
Before starting, you might want to watch this YouTube video on invisible zippers.
Materials List:
*felt - if you use Eco Rainbow Felt it can be washed on gentle and air dried
*embroidery thread
*embroidery needle
*felt or tacky glue
*pins
*invisible zipper foot that fits your machine
*invisible zipper - these don't come in a very wide assortment of colors or sizes. Get one that is longer than the wallet you're making and that has a zipper pull that matches or coordinates with your felt
*optional: decorative buttons
1. Cut two pieces of felt measuring 8 x 6 inches (these will be the two outside pieces) and two pieces measuring 8 x 5 inches (these will be on the inside - I made mine a light color so it's easier to see what is inside the wallet). This is a very easy pattern to adjust. I like my wallets to be bigger - more like clutches. That way I can put my cell phone and a couple of other essentials in them if I don't want to carry my shoulder bag. If you want a different size, just make the width of the lining pieces 1 inch smaller than the outside pieces' width.
2. Iron (on synthetic setting) the zipper coils flat. They won't be exactly flat, just flatter than they were.
3. Open up the zipper and place with the zipper pull down. Line up the edge of the zipper's right tape with a long side of one outer felt, placing zipper stop about 1/4 inch in. The right side of the zipper should face the right side of the fabric if your felt has one. Pin and baste.
4. Lay the other outer felt piece on top of the piece you just basted. Pin the other half of the zipper to this piece in the same way as the first half. You'll roll back the edge first, as in the photo below, so your zipper will lay flat and not be twisted. Baste.
5. Close the zipper and make sure you haven't twisted it. This is easier to do than you think!
6. To the right is a common type of invisible zipper foot. This is the one used with the Brother 6000i. When I bought my machine, it did not come with it and I had to order it separately. I'm not sure whether or not it does now. Basically, it has two channels underneath. The zipper coil goes through one of the channels, depending on which side you're sewing - like a regular zipper foot. Notice the round hole in the middle for the machine needle to go through? Make sure you have your needle placed so it can do that. With the Brother, that's a 01 straight stitch.
7. Starting at the top of the zipper, put the coil in the right channel as shown below. Sew all the way down to the bottom of the felt piece. While you're sewing, roll the zipper coil flat to make sure it doesn't get caught in the needle.
8. Repeat with the other coil using the left side channel.
9. Close the zipper. Your piece should look like this:
10. Cut your decorative felt pieces out and attach with a small dab of felt or tacky glue. Attach pieces with a blanket stitch and 2 strands of embroidery thread. Sew on any decorative buttons you're using. I made the bee's "track" with 3 strands of thread and a running stitch. If you haven't made layered felt pieces before, read over this past blog for more information.
11. To shorten the zipper, hand sew over the end about 3/8 inch from the side as shown in the photo below.
Do this several times.
12. Insert needle under top of stitches you just made and put it through from the top again. Repeat this until you reach the end of the stitches. This makes a bar tack.
13. Trim end of the zipper 1/4 inch in and trim the ends off the top of the zipper.
14. Pin the two pieces of inside felt together.
15. Fold in half and mark the center with chalk or disappearing fabric pen. Sew a line just off of the middle, take a couple stitches at the bottom, and sew up the other side of the line.
16. Open up outside piece of felt and place face down. Lay inside felt on one half of the outside felt - match bottoms (end without the zipper) and put the side where you took a couple stitches at the top (the zipper end).
17. Fold top of outside piece down making a sandwich with the inside piece. Pin sides and bottom.
18.Sew pinned edges about 1/4 inch in. Don't worry if the inside piece of felt sticks out a bit.
19. Trim inside piece and round the bottom edges.
20. With 6 strands of embroidery thread, blanket stitch around the two sides and the bottom.
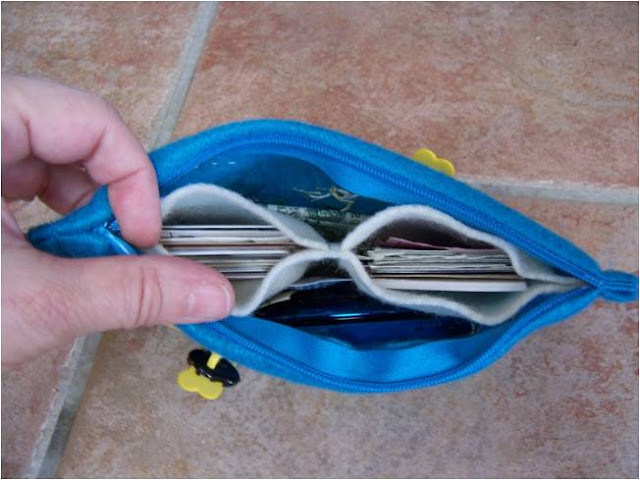
And fill up!
Happy Creating! Deborah
Subscribe to:
Post Comments (Atom)


No comments:
Post a Comment